

Away from blogging for quite a while, I am still faithful to my house project completion. In fact, I wanted to do away with the “wet” activities, such as painting, deep cleaning and installations, before I move to the dry and stain-proof field of textiles.
I was however interrupted by the winter, which left me unable to select a few more neutrals. I decided not to spend the season in another neutral maze and proceeded to (drumroll) soft furnishings!
I do indeed put so much emphasis on that because soft furnishings are what makes a house fit for living. Other than being associated with warmth, cosines, visual pleasure and overall feeling of a completed room, soft furnishings are indispensable for the acoustic comfort of any space.
I specifically bring this last one in, because my project one ended up with a nice tiled floor, has a huge window, is relatively small and I keep the doors preferable open. So, having already sorted the curtains (like in every other room), I gladly proceed to UPHOLSTERY.
While I find myself a reasonably skilled seamstress, the idea of doing something so novel and uncontrollable with fabric has always scared me. Here is how I lost my fear of the draper’s stapler.
1.A few good reads. Well, that is how I start most things – getting inspire and informed, and ultimately not following the rules proscribed in the books. Why’d I still insist on books then? Inspiration is the word. I noticed that for one – my book of choice had a great many examples of finished pieces and they are often of antiquary value. Therefore, I concluded, it should not be a great risk to start with an easy to replace and dispose IKEA items (Remember those fellows? – my precious chests which will become permanent in the dining area can be upgraded to saloon furniture whereas IKEA only sells them as garden pieces)

2.Toolbox. Again, the book may aim to discourage you by showing a myriad of almost surgical utensils. However, when carefully analysed, you’d notice that they are mostly needed for upholstering chairs where the jobs run so deep that an amateur would rather buy a new chair. So – just one new tool needed – the mighty stapler (provided that you already have sewing tools).
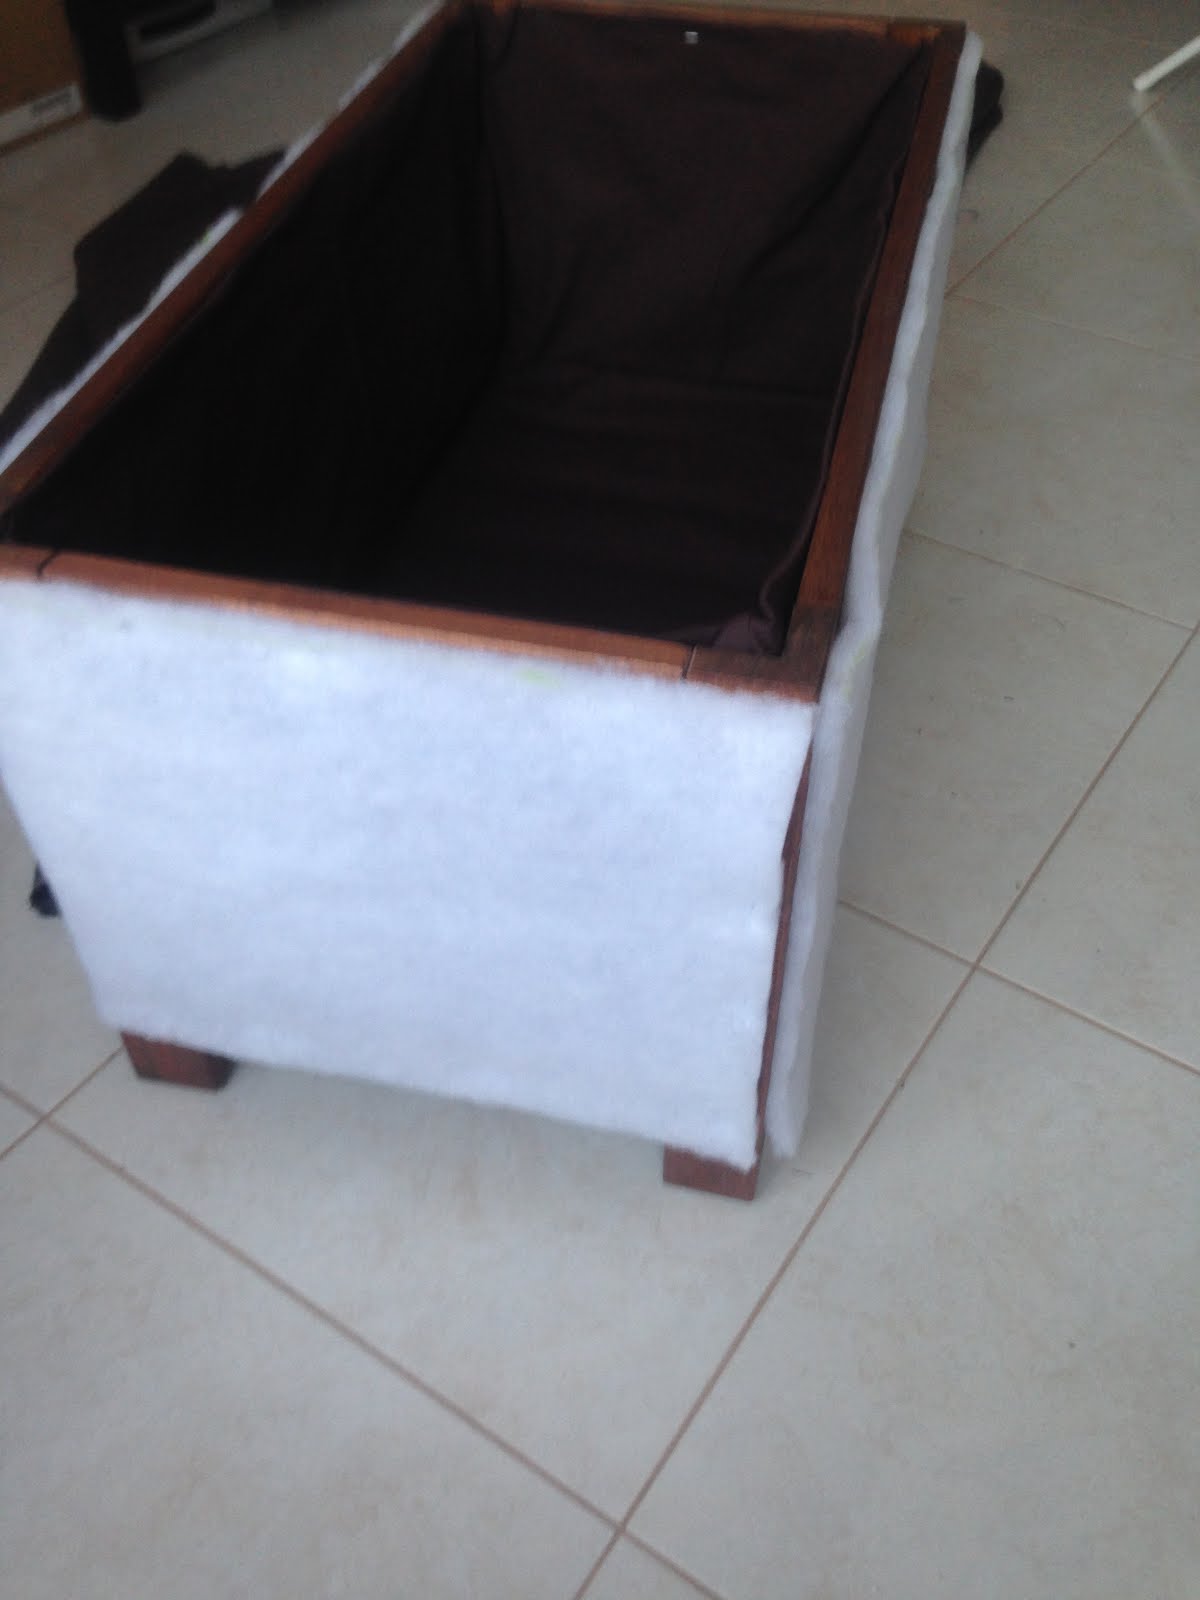
3.Materials – ordinary and extraordinary. I feel this is a subject for a full chapter, because other than the technique it is the correct choice of materials which will guarantee your success.
My choice of fabric aimed to bring the chests in the colour scheme of the room – that is fairly obvious. However, I also wanted a more sophisticated look – therefore I considered from the beginning the use of piping (it is said that when you add piping to a cushion it instantly takes it to a higher level. Feel free to comment on that).
Next, I wanted to use the fabric to unify my sofa with the said chests – a very safe way to create an ensemble from different pieces. Thus – another criterion came by – the fabric should be good for both fixed and removable upholstery.
Finally – I love linen, and this solved it in the decision-making department pretty quickly. I do not however recommend it since it is easy to crease, tricky to saw straight on, and less durable than the synthetic fabrics. Having said that I am glad that the nice people at Max Bloch’s helped me choose the one linen which might answer better to the challenges above.
Lastly – the quantities were another difficult exercise to establish. Basically I had to think of the upholstery as surface area, but be careful not to include the bottoms. I’d also provide a fabric of lesser quality for the parts which are not exposed. So, taking into consideration only the pieces requested, I rearranged the puzzle several times, until optimal solution was found (and must admit to my chagrin – could have done it better if taking the exact measurements of the pieces to cut, that is size plus borders).

As extraordinary materials I’d supply padding, foam and buttons. Watching a number of YouTube videos helped me reduce the choice to what was really necessary. Because it was my first attempt at upholstery, I avoided on-line shopping. It may have been more expensive and time consuming to go to the shops, but the advice from weathered professionals, was indispensable. Another not-do-it-yourself are the buttons – those available with the DIY kits are only meant for very fine fabrics. The price is sadly the same as when ordered in specialised shop...
4.And action! As mentioned beforehand – stapling is clearly easier than sawing. So the work was pleasant and advanced smoothly. I mostly hesitated before cutting fabric (expensive mistakes possible!) and made sure to measure for fit most of the pieces. I may have given the piping more consideration – when cut it doesn’t look good, so it is interesting to initially consider where piping can work in closed loops and therefore not cut ends exposed. Halas – next time!


5.Will I do it again? Most certainly yes – in fact the experience makes me fearless of fixed upholstery and am already evaluating other ideas. What next? Removable upholstery is definitely the challenge, so stay tuned!
